01
Bright, everyday living
TV
Everyday viewing in a bright, multipurpose room
A practical starting point when controlling daylight is difficult.
PLAN FOR
Screen size, glare and the audio setup.
HAP SINGAPORE / HOME CINEMA
Choosing a projector in Singapore starts with your room, your preferred screen size and how you plan to watch - not just the projector model.
HAP supplies and installs home-theatre projectors in Singapore, with screen selection, audio integration and installation planning tailored to your room.
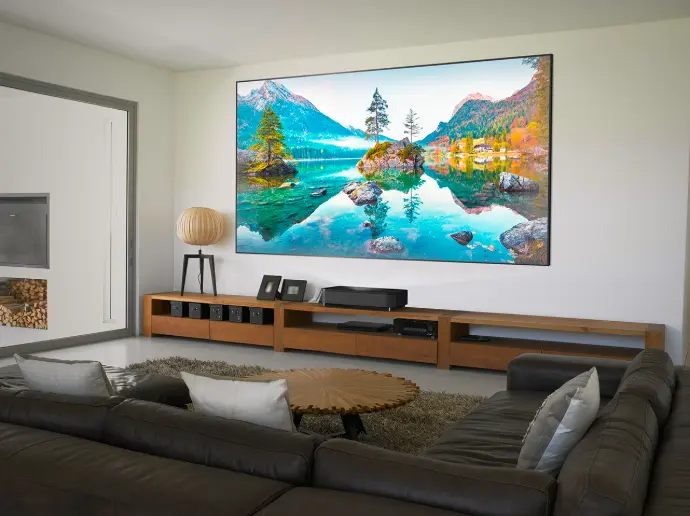
A TV may be the more practical choice for everyday viewing in a bright room. An ultra short throw (UST) projector offers a large-screen option with the projector positioned close to the screen. A long-throw projector is worth considering for a dedicated home theatre where lighting, screen size and speaker placement can be planned together.
This guide explains how to choose between these approaches, select a suitable screen and plan the audio and installation. At HAP, we look at the projector, screen and sound system together - not as separate purchases.
01 START WITH THE ROOM
Bright, everyday living
Everyday viewing in a bright, multipurpose room
A practical starting point when controlling daylight is difficult.
Screen size, glare and the audio setup.
A big screen, close to the wall
Large-screen entertainment with the projector close to the screen
Worth considering when a rear or ceiling-mounted projector is impractical.
A compatible screen, console position and space for the centre speaker.
A planned home cinema
A dedicated home theatre with controlled lighting
Worth considering when the room allows the projector, screen and surround sound to be planned together.
Throw distance, mounting, cable routes and the screen-and-speaker arrangement.
THE FIRST DECISION
For a screen around 100 inches, compare a TV first when everyday daytime viewing and straightforward operation are your priorities. This is a starting point, not a rule that projection only becomes worthwhile above 100 inches.
Consider where daylight enters the room, whether you are willing to close curtains and how the screen will be used outside movie nights. A television is often the more practical starting point when the room must remain bright throughout the day.
For a 120-inch, 150-inch or larger cinema-style image, projection deserves serious consideration. The room still needs enough usable wall space, an appropriate seating distance and a projector-and-screen combination that suits the lighting.
For a room shared between movies, sports and karaoke, a large projected image can become the centrepiece of the experience. Plan the viewing positions and audio together so the display is enjoyable to use, not simply impressive in size.
Projection creates an image by reflecting light from a screen, rather than presenting the picture directly on a television panel. Judge the viewing experience at a comfortable brightness in the conditions you actually plan to use.
PROJECTORS TO EXPLORE
These models represent the main projector approaches in this guide. Choose by room and installation style first, then open a product to see the full HAP eCommerce listing.
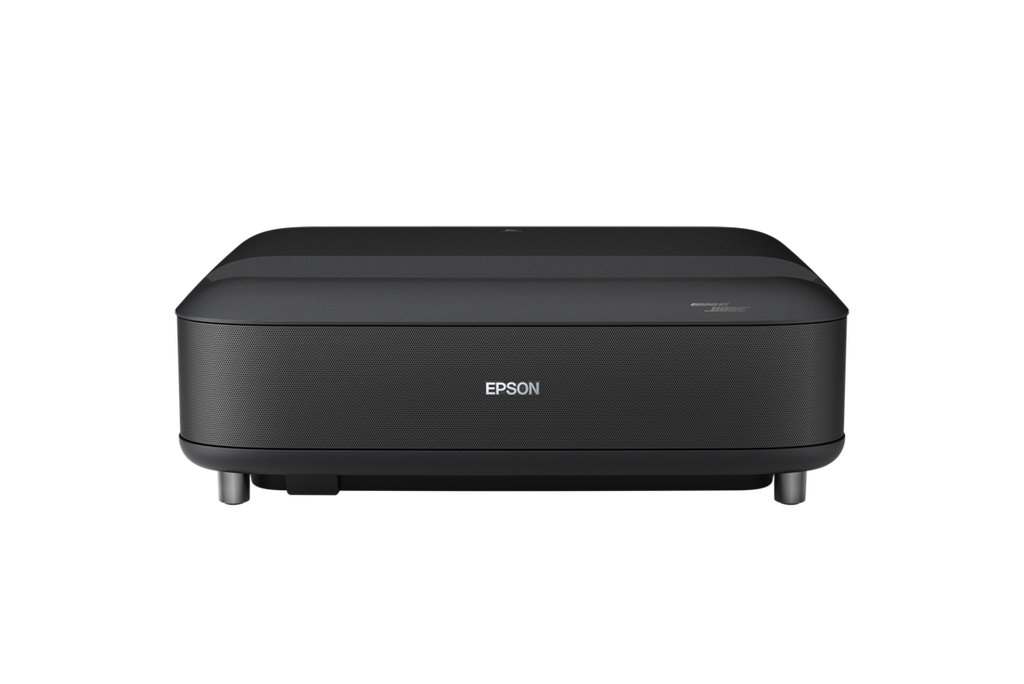
A living-room direction when you want the projector positioned close to the screen wall.
View product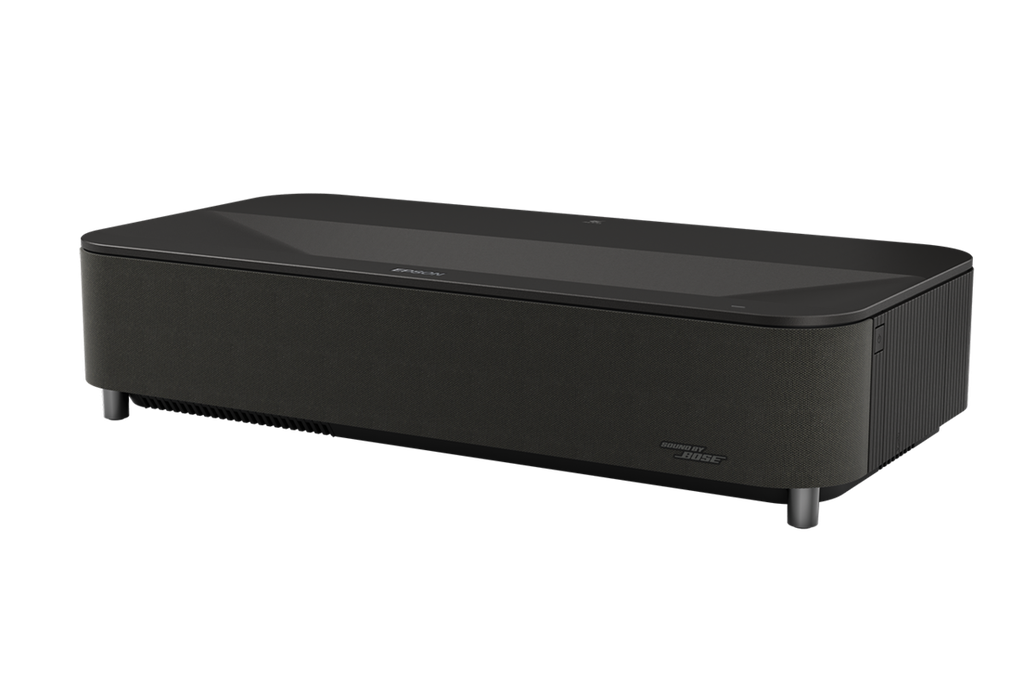
A premium UST direction for living rooms or media spaces requiring a larger projected image.
View product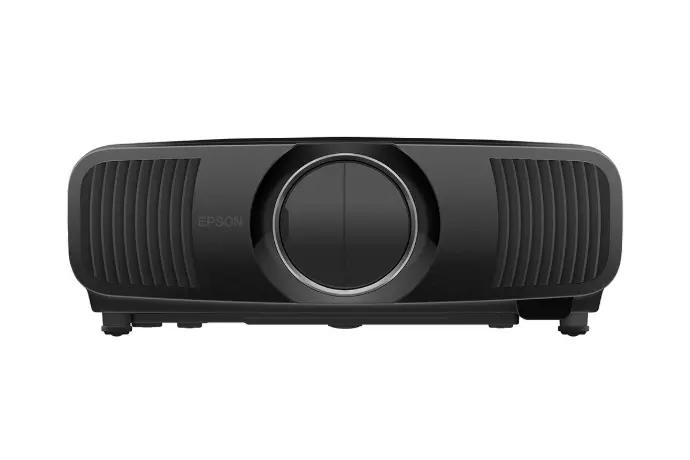
A dedicated-cinema direction where projector placement, screen, seating and external AV are planned together.
View product02 SIZE & DISTANCE
Start with usable wall width and seating distance together. A screen that fits the wall may still be uncomfortable from the sofa, while a comfortable viewing size may leave insufficient room for speakers or cabinetry.
The following dimensions are calculated for a 16:9 visible image. They exclude the screen frame, casing, mounting space and any clearance needed behind the screen.
120-inch 16:9 image: approximately 2.66 metres wide and 1.49 metres high.
| Screen diagonal | Approximate image width | Approximate image height |
|---|---|---|
| 100 inches | 2.21 m | 1.25 m |
| 120 inches | 2.66 m | 1.49 m |
| 150 inches | 3.32 m | 1.87 m |
| 180 inches | 3.98 m | 2.24 m |
| 200 inches | 4.43 m | 2.49 m |
A 2.8-metre-wide wall may accommodate a 120-inch image, subject to the frame and installation clearances. It does not accommodate a 150-inch or 180-inch 16:9 image.
Before committing, mark the proposed image outline on the wall and assess it from the intended seats. Check the screen height, sightlines, speaker positions and space for the projector or console.
Viewing distance is the distance from the viewer to the screen. Throw distance is the projector-to-screen distance, measured from the reference point specified by the manufacturer.
For UST models, use the manufacturer's installation dimensions. The gap between the projector casing and the wall is not the same measurement as the optical throw distance.
CONVENTIONAL PROJECTION
Image width × throw ratio
= throw distance
UST placement must follow the specific model's installation dimensions.
03 CHOOSE THE INSTALLATION APPROACH
Ultra short throw describes projection from very close to the screen. It should not be treated as interchangeable with every short-throw projector. Check the specific model's placement requirements.
Likewise, ceiling-mounted describes an installation position, not a separate projection technology. The lens and throw ratio determine where the projector can sit.
| Consideration | Ultra short throw | Long throw |
|---|---|---|
| Typical position | On a console close to the screen. | Farther from the screen, often on a ceiling mount or suitable rear shelf. |
| Cabling | Can keep sources and connections around the front wall. | May require a longer signal route between the AV equipment and projector. |
| Front-wall layout | Projector and centre speaker may need to share the space below the image. | Projector can be kept away from the screen wall. |
| Screen choice | Needs a surface suitable for UST projection; light-rejecting screens require particular care. | Screen selection depends on the lens, lighting and any behind-screen speakers. |
| Image size | Limited by the model's supported range and installation geometry. | Larger sizes may be practical with the right lens, brightness and room. |
| Main planning task | Coordinate console depth, screen height, alignment and audio. | Coordinate throw distance, mounting, cabling and the complete cinema layout. |
NEAR THE SCREEN
A UST projector is worth considering when you want a large image but cannot conveniently install a projector farther back in the room. Keeping the projector near the screen can also reduce the need for a new ceiling-level signal route.
Where suitable front-wall power and AV connections already exist, installation may involve less renovation. However, a compatible screen, precise alignment and suitable cabinetry still need to be included in the plan.
Do not assume every UST model will fit on an existing TV console. Check the required cabinet depth, projector height, screen position, ventilation and access to connections before ordering furniture.
A stable projector position and a flat, suitable screen surface are important. Select a fixed-frame or appropriately tensioned screen that the manufacturer identifies as compatible with the intended projection arrangement.
The Epson EH-LS670B and EH-LS970B include Sound by Bose, providing an integrated starting point for everyday entertainment.
For a separate surround-sound system, plan the AV receiver and speaker layout from the beginning. Built-in audio does not provide the same physical speaker arrangement as a system with separate front, surround and height channels.
FARTHER FROM THE SCREEN
A long-throw home cinema projector is worth considering when you want the display and audio designed as a complete home theatre. Suitable ceiling or rear placement can keep the projector off the front console and preserve the screen wall for the image and speakers.
The projector cannot simply go anywhere behind the sofa. Its throw range, lens shift, ventilation requirements and mounting instructions must match the intended position. The Epson EH-LS12000B, for example, provides powered lens controls and substantial lens shift for installation flexibility.
When choosing a movie projector for a 120-inch to 200-inch screen, assess the projector and screen together. Available light output, screen surface, room lighting and lens requirements matter as much as the advertised maximum image size.
Ceiling mounting may require structural fixing, power provision, a longer HDMI or active optical cable route, and access for adjustment and maintenance.
Plan these requirements before the ceiling is closed. A neat final appearance depends on the mounting and cabling being designed into the room, rather than added after the finishes are complete.
04 PICTURE & SOUND, TOGETHER
A larger screen should not force the speakers into unsuitable positions. The display, seating and audio layout need to be considered together.
Plan the screen and the speakers.
Not one after the other.
An acoustically transparent screen allows sound to pass through its material, making it possible to place the left, centre and right speakers - the LCR speakers - behind the image.
This gives a dedicated cinema more freedom to align dialogue with the picture and position the front speakers at suitable heights. Dolby's guidance places conventional main speakers around seated ear level, with adjustments for the actual speaker and room layout.
The screen material, speaker-to-screen spacing and installation depth still need checking. An acoustically transparent screen is part of an audio design, not a substitute for one.
With a conventional solid UST screen, the centre speaker normally needs a position outside the visible image. The projector may occupy the area where that speaker would otherwise sit.
Possible approaches include a carefully positioned centre speaker, purpose-designed cabinetry or a custom front soundbar arrangement. Any speaker between the projector and screen must remain clear of the projection beam.
HAP can assess which arrangement suits the room. Get the physical layout right first, then use calibration to refine the result.
UST-compatible acoustically transparent screens do exist. Specialist materials are available from manufacturers such as Screen Research and Elite Screens, but compatibility and suitability must be checked for the particular screen, projector and room.
Surround speakers, subwoofers and Dolby Atmos channels need their own layout around the listening positions. Projector location alone does not determine where these speakers belong.
For a combined movie and karaoke room, include microphone equipment, source switching and audio requirements in the initial brief. Do not leave karaoke integration until the screen wall and equipment cabinet are already finished.
THE SCREEN IS PART OF THE SYSTEM
Choose the screen for the projector's light path, the room lighting and the speaker arrangement, not just its diagonal size.
A suitable matte-white surface is worth considering in a light-controlled room. Flatness, frame or motorised construction, viewing angle and projector compatibility remain important.
ALR means ambient light rejecting. These screens are designed to reduce the effect of light arriving from particular directions; they do not remove every source of room light.
CLR means ceiling light rejecting. The term is commonly used for surfaces designed to reduce overhead light, including screens intended for tabletop UST projectors.
Do not assume a generic ALR screen is suitable for UST. Some surfaces are designed for conventional long-throw projection, while others are designed for the steep light path of a UST projector. Screen orientation also matters.
Curtains, blinds and sensible lighting placement remain part of the solution. A light-rejecting screen should not be treated as a substitute for managing strong light falling on the image.
Choose this approach when behind-screen speakers are part of the design. Confirm sound transmission, viewing distance, installation depth and compatibility with the projector.
Acoustic transparency and ambient-light rejection are different properties. Do not assume a screen has both simply because it has one.
05 FROM ROOM PLAN TO MODEL
Use the room plan to narrow the options, then compare the individual models. These five projectors support the UST, dedicated-cinema and custom-installation approaches discussed in this guide.
| Model | Application to consider | Key planning information |
|---|---|---|
| Epson EH-LS670B | UST living-room or entertainment setup. | 4K PRO-UHD projection, images up to 120 inches and Sound by Bose. |
| Epson EH-LS970B | UST setup with a larger-image requirement. | Images up to 150 inches and Sound by Bose; check console and screen dimensions for the intended size. |
| Epson EH-LS12000B | Planned long-throw home theatre. | 2,700 lumens of white and colour brightness, powered zoom and wide lens shift. |
| Epson EH-LS9000B | Another long-throw home-cinema option to assess. | 2,200 lumens of white and colour brightness, powered lens controls and lens shift. |
| Epson EH-QL3000W | Custom cinema or media room requiring higher output and lens flexibility. | 6,000-lumen specification and interchangeable lenses; select and budget for the lens separately. |
4K describes image resolution; laser describes the light source. Neither label tells you whether the projector will fit your room.
Check the model's displayed-resolution specification and technology rather than assuming every 4K-labelled projector uses native 4K panels. Epson identifies pixel-shifting technology in the specifications of relevant models in this range.
For HAP's detailed comparison of the LS670B, LS970B and LS12000B, see Epson Projector Singapore (opens in a new tab). For listed products, browse Home Theatre Projectors & Screens (opens in a new tab).
Confirm availability, demonstration models and the complete installation specification with HAP before ordering.
06 PLAN BEFORE THE FINISHES
The most useful time to discuss a projector system is before cabinetry, ceiling works and cable routes are finalised.
Visible image dimensions, screen height, viewing positions and space for speakers or behind-screen construction.
Throw distance, lens adjustment, mounting support, power, ventilation and maintenance access.
Source and AV receiver locations, cable length and the video/audio formats the complete connection must support.
Accessible conduit, suitable connector clearance and a practical replacement route; consider a spare cable where useful.
Front and surround speaker positions, subwoofers, equipment access and ventilation.
Curtains or blinds, lights near the screen, source switching and any agreed smart-home integration.
For longer routes, an active optical HDMI cable may be appropriate. Match it to the required resolution, refresh rate, HDR and audio-return requirements rather than buying by cable length alone. Check installation direction and handling instructions for the selected cable.
Our planning recommendation is to test the complete source-to-display connection before concealing it and retain a practical replacement route. A spare conduit can be valuable when equipment or cable requirements change later.
A complete quotation should make clear what is included: projector, screen, mounting, cabling, audio integration, installation and setup. This is more useful than comparing projector-only prices for systems with different scopes.
HAP PROJECT PORTFOLIO
See the complete-system approach in context.
07 USEFUL ANSWERS
The room, the screen and the sound.
A few things worth knowing before you
choose.
Start with room lighting, desired image size and available projector position. A UST model may suit front-console placement, while a long-throw model may suit a planned cinema layout. The best fit also depends on the screen and audio arrangement.
It can serve as the main display for movies, sport and entertainment when the screen, lighting, sources and audio are planned together. A TV may remain more practical when bright daytime viewing is the main priority.
They are worth considering when a large image is a priority and the room can support the installation. Compare the complete experience - screen size, lighting, sound and everyday operation - rather than treating a projector as an automatic upgrade from a TV.
A 120-inch 16:9 image is approximately 2.66 metres wide and 1.49 metres high. Add the frame or casing dimensions and installation clearances. Projector distance and cabinet space must be checked separately.
Not automatically. Room dimensions, seating, light control, screen position and available cable routes matter more than the property label. Assess the actual room rather than choosing purely because the home is a condo or landed property.
It is worth considering where ambient light is difficult to control, but the material must be suitable for UST projection. In a light-controlled room, other compatible surfaces may be appropriate. Check the screen and projector as a pair.
Yes, with a suitable UST-compatible acoustically transparent screen and a properly designed installation. Do not assume an ordinary solid UST light-rejecting screen allows sound through it.
Plan the screen wall, seating, projector position and speakers together. Buying one component first can unnecessarily restrict the others, especially when a centre speaker, UST console or behind-screen speaker arrangement is involved.
HAP / SINGAPORE
Whether you are considering a UST living-room setup, a dedicated home theatre or a combined movie and karaoke room, HAP can help you explore the projector, screen, audio and installation as one system.
Share your floor plan or room photos, preferred screen size, seating distance, existing equipment and renovation stage. These details give us a useful starting point for discussing the right approach.
VISIT HAP BY APPOINTMENT
55 Ubi Avenue 3Confirm the demonstration models available before your visit.
Bring your floor plan or room photos, preferred screen size, seating distance and renovation stage.
HAP SINGAPORE / HOME CINEMA
Choosing a projector in Singapore starts with your room, your preferred screen size and how you plan to watch - not just the projector model.
HAP supplies and installs home-theatre projectors in Singapore, with screen selection, audio integration and installation planning tailored to your room.
A TV may be the more practical choice for everyday viewing in a bright room. An ultra short throw (UST) projector offers a large-screen option with the projector positioned close to the screen. A long-throw projector is worth considering for a dedicated home theatre where lighting, screen size and speaker placement can be planned together.
This guide explains how to choose between these approaches, select a suitable screen and plan the audio and installation. At HAP, we look at the projector, screen and sound system together - not as separate purchases.
01 START WITH THE ROOM
Bright, everyday living
Everyday viewing in a bright, multipurpose room
A practical starting point when controlling daylight is difficult.
Screen size, glare and the audio setup.
A big screen, close to the wall
Large-screen entertainment with the projector close to the screen
Worth considering when a rear or ceiling-mounted projector is impractical.
A compatible screen, console position and space for the centre speaker.
A planned home cinema
A dedicated home theatre with controlled lighting
Worth considering when the room allows the projector, screen and surround sound to be planned together.
Throw distance, mounting, cable routes and the screen-and-speaker arrangement.
THE FIRST DECISION
For a screen around 100 inches, compare a TV first when everyday daytime viewing and straightforward operation are your priorities. This is a starting point, not a rule that projection only becomes worthwhile above 100 inches.
Consider where daylight enters the room, whether you are willing to close curtains and how the screen will be used outside movie nights. A television is often the more practical starting point when the room must remain bright throughout the day.
For a 120-inch, 150-inch or larger cinema-style image, projection deserves serious consideration. The room still needs enough usable wall space, an appropriate seating distance and a projector-and-screen combination that suits the lighting.
For a room shared between movies, sports and karaoke, a large projected image can become the centrepiece of the experience. Plan the viewing positions and audio together so the display is enjoyable to use, not simply impressive in size.
Projection creates an image by reflecting light from a screen, rather than presenting the picture directly on a television panel. Judge the viewing experience at a comfortable brightness in the conditions you actually plan to use.
PROJECTORS TO EXPLORE
These models represent the main projector approaches in this guide. Choose by room and installation style first, then open a product to see the full HAP eCommerce listing.
A living-room direction when you want the projector positioned close to the screen wall.
View product
A premium UST direction for living rooms or media spaces requiring a larger projected image.
View product
A dedicated-cinema direction where projector placement, screen, seating and external AV are planned together.
View product02 SIZE & DISTANCE
Start with usable wall width and seating distance together. A screen that fits the wall may still be uncomfortable from the sofa, while a comfortable viewing size may leave insufficient room for speakers or cabinetry.
The following dimensions are calculated for a 16:9 visible image. They exclude the screen frame, casing, mounting space and any clearance needed behind the screen.
120-inch 16:9 image: approximately 2.66 metres wide and 1.49 metres high.
| Screen diagonal | Approximate image width | Approximate image height |
|---|---|---|
| 100 inches | 2.21 m | 1.25 m |
| 120 inches | 2.66 m | 1.49 m |
| 150 inches | 3.32 m | 1.87 m |
| 180 inches | 3.98 m | 2.24 m |
| 200 inches | 4.43 m | 2.49 m |
A 2.8-metre-wide wall may accommodate a 120-inch image, subject to the frame and installation clearances. It does not accommodate a 150-inch or 180-inch 16:9 image.
Before committing, mark the proposed image outline on the wall and assess it from the intended seats. Check the screen height, sightlines, speaker positions and space for the projector or console.
Viewing distance is the distance from the viewer to the screen. Throw distance is the projector-to-screen distance, measured from the reference point specified by the manufacturer.
For UST models, use the manufacturer's installation dimensions. The gap between the projector casing and the wall is not the same measurement as the optical throw distance.
CONVENTIONAL PROJECTION
Image width × throw ratio
= throw distance
UST placement must follow the specific model's installation dimensions.
03 CHOOSE THE INSTALLATION APPROACH
Ultra short throw describes projection from very close to the screen. It should not be treated as interchangeable with every short-throw projector. Check the specific model's placement requirements.
Likewise, ceiling-mounted describes an installation position, not a separate projection technology. The lens and throw ratio determine where the projector can sit.
| Consideration | Ultra short throw | Long throw |
|---|---|---|
| Typical position | On a console close to the screen. | Farther from the screen, often on a ceiling mount or suitable rear shelf. |
| Cabling | Can keep sources and connections around the front wall. | May require a longer signal route between the AV equipment and projector. |
| Front-wall layout | Projector and centre speaker may need to share the space below the image. | Projector can be kept away from the screen wall. |
| Screen choice | Needs a surface suitable for UST projection; light-rejecting screens require particular care. | Screen selection depends on the lens, lighting and any behind-screen speakers. |
| Image size | Limited by the model's supported range and installation geometry. | Larger sizes may be practical with the right lens, brightness and room. |
| Main planning task | Coordinate console depth, screen height, alignment and audio. | Coordinate throw distance, mounting, cabling and the complete cinema layout. |
NEAR THE SCREEN
A UST projector is worth considering when you want a large image but cannot conveniently install a projector farther back in the room. Keeping the projector near the screen can also reduce the need for a new ceiling-level signal route.
Where suitable front-wall power and AV connections already exist, installation may involve less renovation. However, a compatible screen, precise alignment and suitable cabinetry still need to be included in the plan.
Do not assume every UST model will fit on an existing TV console. Check the required cabinet depth, projector height, screen position, ventilation and access to connections before ordering furniture.
A stable projector position and a flat, suitable screen surface are important. Select a fixed-frame or appropriately tensioned screen that the manufacturer identifies as compatible with the intended projection arrangement.
The Epson EH-LS670B and EH-LS970B include Sound by Bose, providing an integrated starting point for everyday entertainment.
For a separate surround-sound system, plan the AV receiver and speaker layout from the beginning. Built-in audio does not provide the same physical speaker arrangement as a system with separate front, surround and height channels.
FARTHER FROM THE SCREEN
A long-throw home cinema projector is worth considering when you want the display and audio designed as a complete home theatre. Suitable ceiling or rear placement can keep the projector off the front console and preserve the screen wall for the image and speakers.
The projector cannot simply go anywhere behind the sofa. Its throw range, lens shift, ventilation requirements and mounting instructions must match the intended position. The Epson EH-LS12000B, for example, provides powered lens controls and substantial lens shift for installation flexibility.
When choosing a movie projector for a 120-inch to 200-inch screen, assess the projector and screen together. Available light output, screen surface, room lighting and lens requirements matter as much as the advertised maximum image size.
Ceiling mounting may require structural fixing, power provision, a longer HDMI or active optical cable route, and access for adjustment and maintenance.
Plan these requirements before the ceiling is closed. A neat final appearance depends on the mounting and cabling being designed into the room, rather than added after the finishes are complete.
04 PICTURE & SOUND, TOGETHER
A larger screen should not force the speakers into unsuitable positions. The display, seating and audio layout need to be considered together.
Plan the screen and the speakers.
Not one after the other.
An acoustically transparent screen allows sound to pass through its material, making it possible to place the left, centre and right speakers - the LCR speakers - behind the image.
This gives a dedicated cinema more freedom to align dialogue with the picture and position the front speakers at suitable heights. Dolby's guidance places conventional main speakers around seated ear level, with adjustments for the actual speaker and room layout.
The screen material, speaker-to-screen spacing and installation depth still need checking. An acoustically transparent screen is part of an audio design, not a substitute for one.
With a conventional solid UST screen, the centre speaker normally needs a position outside the visible image. The projector may occupy the area where that speaker would otherwise sit.
Possible approaches include a carefully positioned centre speaker, purpose-designed cabinetry or a custom front soundbar arrangement. Any speaker between the projector and screen must remain clear of the projection beam.
HAP can assess which arrangement suits the room. Get the physical layout right first, then use calibration to refine the result.
UST-compatible acoustically transparent screens do exist. Specialist materials are available from manufacturers such as Screen Research and Elite Screens, but compatibility and suitability must be checked for the particular screen, projector and room.
Surround speakers, subwoofers and Dolby Atmos channels need their own layout around the listening positions. Projector location alone does not determine where these speakers belong.
For a combined movie and karaoke room, include microphone equipment, source switching and audio requirements in the initial brief. Do not leave karaoke integration until the screen wall and equipment cabinet are already finished.
THE SCREEN IS PART OF THE SYSTEM
Choose the screen for the projector's light path, the room lighting and the speaker arrangement, not just its diagonal size.
A suitable matte-white surface is worth considering in a light-controlled room. Flatness, frame or motorised construction, viewing angle and projector compatibility remain important.
ALR means ambient light rejecting. These screens are designed to reduce the effect of light arriving from particular directions; they do not remove every source of room light.
CLR means ceiling light rejecting. The term is commonly used for surfaces designed to reduce overhead light, including screens intended for tabletop UST projectors.
Do not assume a generic ALR screen is suitable for UST. Some surfaces are designed for conventional long-throw projection, while others are designed for the steep light path of a UST projector. Screen orientation also matters.
Curtains, blinds and sensible lighting placement remain part of the solution. A light-rejecting screen should not be treated as a substitute for managing strong light falling on the image.
Choose this approach when behind-screen speakers are part of the design. Confirm sound transmission, viewing distance, installation depth and compatibility with the projector.
Acoustic transparency and ambient-light rejection are different properties. Do not assume a screen has both simply because it has one.
05 FROM ROOM PLAN TO MODEL
Use the room plan to narrow the options, then compare the individual models. These five projectors support the UST, dedicated-cinema and custom-installation approaches discussed in this guide.
| Model | Application to consider | Key planning information |
|---|---|---|
| Epson EH-LS670B | UST living-room or entertainment setup. | 4K PRO-UHD projection, images up to 120 inches and Sound by Bose. |
| Epson EH-LS970B | UST setup with a larger-image requirement. | Images up to 150 inches and Sound by Bose; check console and screen dimensions for the intended size. |
| Epson EH-LS12000B | Planned long-throw home theatre. | 2,700 lumens of white and colour brightness, powered zoom and wide lens shift. |
| Epson EH-LS9000B | Another long-throw home-cinema option to assess. | 2,200 lumens of white and colour brightness, powered lens controls and lens shift. |
| Epson EH-QL3000W | Custom cinema or media room requiring higher output and lens flexibility. | 6,000-lumen specification and interchangeable lenses; select and budget for the lens separately. |
4K describes image resolution; laser describes the light source. Neither label tells you whether the projector will fit your room.
Check the model's displayed-resolution specification and technology rather than assuming every 4K-labelled projector uses native 4K panels. Epson identifies pixel-shifting technology in the specifications of relevant models in this range.
For HAP's detailed comparison of the LS670B, LS970B and LS12000B, see Epson Projector Singapore (opens in a new tab). For listed products, browse Home Theatre Projectors & Screens (opens in a new tab).
Confirm availability, demonstration models and the complete installation specification with HAP before ordering.
06 PLAN BEFORE THE FINISHES
The most useful time to discuss a projector system is before cabinetry, ceiling works and cable routes are finalised.
Visible image dimensions, screen height, viewing positions and space for speakers or behind-screen construction.
Throw distance, lens adjustment, mounting support, power, ventilation and maintenance access.
Source and AV receiver locations, cable length and the video/audio formats the complete connection must support.
Accessible conduit, suitable connector clearance and a practical replacement route; consider a spare cable where useful.
Front and surround speaker positions, subwoofers, equipment access and ventilation.
Curtains or blinds, lights near the screen, source switching and any agreed smart-home integration.
For longer routes, an active optical HDMI cable may be appropriate. Match it to the required resolution, refresh rate, HDR and audio-return requirements rather than buying by cable length alone. Check installation direction and handling instructions for the selected cable.
Our planning recommendation is to test the complete source-to-display connection before concealing it and retain a practical replacement route. A spare conduit can be valuable when equipment or cable requirements change later.
A complete quotation should make clear what is included: projector, screen, mounting, cabling, audio integration, installation and setup. This is more useful than comparing projector-only prices for systems with different scopes.
HAP PROJECT PORTFOLIO
See the complete-system approach in context.
07 USEFUL ANSWERS
The room, the screen and the sound.
A few things worth knowing before you
choose.
Start with room lighting, desired image size and available projector position. A UST model may suit front-console placement, while a long-throw model may suit a planned cinema layout. The best fit also depends on the screen and audio arrangement.
It can serve as the main display for movies, sport and entertainment when the screen, lighting, sources and audio are planned together. A TV may remain more practical when bright daytime viewing is the main priority.
They are worth considering when a large image is a priority and the room can support the installation. Compare the complete experience - screen size, lighting, sound and everyday operation - rather than treating a projector as an automatic upgrade from a TV.
A 120-inch 16:9 image is approximately 2.66 metres wide and 1.49 metres high. Add the frame or casing dimensions and installation clearances. Projector distance and cabinet space must be checked separately.
Not automatically. Room dimensions, seating, light control, screen position and available cable routes matter more than the property label. Assess the actual room rather than choosing purely because the home is a condo or landed property.
It is worth considering where ambient light is difficult to control, but the material must be suitable for UST projection. In a light-controlled room, other compatible surfaces may be appropriate. Check the screen and projector as a pair.
Yes, with a suitable UST-compatible acoustically transparent screen and a properly designed installation. Do not assume an ordinary solid UST light-rejecting screen allows sound through it.
Plan the screen wall, seating, projector position and speakers together. Buying one component first can unnecessarily restrict the others, especially when a centre speaker, UST console or behind-screen speaker arrangement is involved.
HAP / SINGAPORE
Whether you are considering a UST living-room setup, a dedicated home theatre or a combined movie and karaoke room, HAP can help you explore the projector, screen, audio and installation as one system.
Share your floor plan or room photos, preferred screen size, seating distance, existing equipment and renovation stage. These details give us a useful starting point for discussing the right approach.
VISIT HAP BY APPOINTMENT
55 Ubi Avenue 3Confirm the demonstration models available before your visit.
Bring your floor plan or room photos, preferred screen size, seating distance and renovation stage.